Tuesday, June 30, 2009

Entrelac progress

After *months* of idleness earlier with the Spring Bouquet yarn while I waited for the right pattern to come along, I am now making rapid progress on the entrelac turtleneck. Woohoo!!

The entrelac pattern is easy to knit and goes very fast. Before casting on, I arranged the 9 wound skeins in the order that I thought would produce the best blend of colors, and then placed them in individual ziplock bags with a number for each one to mark the sequence. All the little bags then went into one great big bag, in numerical order where they're easy to see & locate at need. Each skein does one "row" (or band) of the entrelac. That simple scheme has worked out remarkably well. It's sort of like painting by numbers and takes ALL the anxiety out of the process of deciding which skein to use at any given moment. That's important, because the main reason I was so hesitant before to jump in & start knitting right away is that I had scared myself into imagining a scenario where I would have to switch off between skeins at odd moments, without any system to guide me. Now I'm wondering what the big deal was.

Meanwhile I decided to knit the front and the back in tandem rather than first one and then the other, because that way I can complete each skein's contribution to both of them before switching to the next skein, and keep an eye on the evolving color arrangement as I go along. I'll do the sleeves together in the same manner, once I have both the front & back done and can decide how best to arrange the colors for the sleeves to coordinate with the body. The front & back pieces are interchangeable until the last inch, when the front has shaping for the neck (& the back doesn't), so although I like to think of the first piece that I cast on as the "back" and the other one as the "front" for purposes of telling them apart and keeping them distinct in my mind, I will wait & see how they develop & eventually pick one for the front, based on what colors I want near my face.

Here they are now, with the "back" on the left and the "front" on the right. I've just finished the fifth row of the entrelac. Click on either image to see a larger view.

The patchwork effect of the entrelac masks the transitions between the skeins almost completely, exactly as I had hoped. Indeed I am amazed with how smooth & harmonious the whole thing looks, given how different the skeins themselves appear when you place them side by side. Here is a closeup of the front, showing off the subtle blend of colors. I'm going to have a HAPPY warm sweater in time for the winter weather. >grin<

Sunday, June 28, 2009

Rediscovering my very *FIRST* lace project

THE YARN

In the summer of 1990, right at the end of my first year in graduate school, I did something that I had never done before and have not repeated since: I purchased an entire CONE of yarn. I bought it at Straw Into Gold in Berkeley, CA, off a dusty shelf crammed full of similar cones from floor to ceiling. There must have been hundreds of them, but before finding that remarkable store, I don't think I even realized that yarn in bulk could be wound on cones. Remember Pippin in the inn at Bree? "It comes in pints?! *I'm* getting one... That was me at the time.

My bounty was a 2-ply fingering weight Shetland wool in a rich heathery color that is a mixture of navy blue and forest green, almost as if somebody took the "Black Watch" tartan and ran it through a blender. I ran across a handful of remnants recently in the course of cleaning out my stash. Here is one of them. I vaguely recall that the cone initially weighed something like 2.5 kg, or maybe 3.25 kg. At any rate it seemed to my younger self like an awful LOT of yarn. I remember thinking that the project would keep me busy for a while. Little did I know...

THE PATTERN

It's called "Garter Lace" by Gene Beugler and was published in the Winter 1989 issue of Knitter's magazine. It was not on Ravelry until I put it there myself, and a Google search revealed only a couple of mentions in the Knitting Universe forum from 2002. This is obviously not one of those famous patterns that every knitter in the blogosphere seems to have added to the queue. Apparently no KALs or support groups have formed up around it. Indeed I had no idea until yesterday that the designer must be the Eugen Beugler of "Frost Flowers and Leaves" fame. That's quite a pedigree for a project that feels like a familiar corner of my own little private knitting universe.

The clever design consists of a garter stitch border surrounding a vast openwork lace panel in which garter stitch rectangles are interspersed at intervals throughout in a sort of lattice-work motif. It's knitted from corner to corner, on the bias, with lace patterning only on the RS rows (you simply knit back on the WS). The original pattern is for a 58" square. You start with just 3 stitches and increase with a yo at the beginning of every row until the widest point, where you begin decreasing at the same rate until only 3 stitches are left again at the end. I worked out a way to make a rectangle instead, by inserting a parallelogram-shaped wedge in between the two corner triangles. For a while I was increasing on one side and decreasing on the other, thereby maintaining a consistent number of stitches at the maximum width before beginning the "real" decrease. So I was able to elongate the finished piece without disrupting the pattern.

THE PROCESS

I distinctly remember casting on those first three stitches and beginning to knit a little steadily growing triangle in the car on the way home from the yarn store. What a sense of adventure! It called for US size 3 (3.25 mm) needles, one or two sizes smaller than I was really used to. I was riding in the back seat with my best friend up front and her sister driving. The three of us shared an apartment at the time, and from that moment onward my lace often accompanied us on our frequent shopping expeditions.

But that was just the beginning. It took a *ridiculously* long time to complete this project. Indeed it was so long in the making that I can't quite pin down when I actually finished it. It just seemed to go on & on. I do recall wondering how much blanket I could eventually eek out of my indeterminate quantity of yarn, and that there came a point when I realized that I was on course to run out of wool before completing the final corner. That would never do! So I had to rip out a bunch of knitting and scale back my ambitions.

The final stages of this process are particularly hazy in my memory. I think maybe I put it away unfinished when I went away to study abroad in 1993-94. It then hibernated quietly on this side of the Atlantic while I was gone — probably just as well, given the need to regroup before starting again after the setback I have described — and I picked it up sometime after my return. I have a vague sense of having wrapped it up sometime around 1995 or thereabouts, when I was living in D.C. to be near my soon-to-be husband who was in graduate school there.

At any rate, having triumphantly finished this astonishingly long-term project, I simply folded it neatly into a zipped blanket bag and packed it away in a closet, fearing that if it ever got into general use around our house, it would end up being hopelessly covered with cat hair and/or ripped to shreds by those little kitty claws. And that was before the three Maine Coons arrived! No textile is safe in our household, especially in the living room.

REDISCOVERY & RECLAMATION

So it was that my handiwork lay hidden from the world for years, until a few days ago I unearthed it for the first time in a very long while. I was prompted by both curiosity and nostalgia, and the idea that I might try to photograph it for my Ravelry profile. To my dismay, I discovered that it had never been properly blocked or even had its loose ends woven in!! I can't quite understand how I could have left it in such a raw, unfinished state, but of course as a graduate student I lacked the tools and techniques, not to mention the chutzpah, to block anything on so large a scale.

This past weekend I labored to remedy the situation and put this blanket to rights with the finishing it deserves. Not surprisingly, for an object knit on the bias, it was stretched out of shape and badly needed to be pulled into the proper alignment. Nor was it as lacy looking as one might have wanted, after so many hours (months, *years*) of needlework effort.

I washed it with Woolite in the bathroom sink first, but it was too bulky and absorbent to rinse easily by hand in that small a basin, so instead I placed it into one of the tightly woven mesh laundry bags that I recently acquired and ran it through several rinse cycles in the washing machine at its gentlest setting. Good call! It came out perfectly, and the slow spinning removed just enough moisture to leave it primed for blocking but not dripping wet.

My first attempt involved pinning it out on wires on the floor of a room in our house that happens to be empty right now. It made a big difference, but unfortunately I just couldn't get enough torque with the pins on the carpet to pull the rectangle properly into shape. This is resilient, springy wool in a fingering weight, not gossamer lace! The only way I know to get sufficient torque with pins is to use the firm top of our queen-sized mattress, but it wouldn't fit on the bed, until I realized that I could fold it in half and run the wires through both layers of the edging, which had the added benefit of really fixing the alignment problem.

Here are several photos of the net result. I am *delighted* with how it turned out. What a transformation! As always, click on any of the images to see a larger version.

The finished product now measures 63" wide by 71" long. My lovely hand-knitted blanket has a whole new lease on life, and it certainly won't get hidden away in a closet again anytime soon. I want to enjoy it from time to time. We'll just have to find a way to protect it from the cats. ;-)

Thursday, June 25, 2009

Entrelac, entre nous -- mais oui!!

Well... I made a swatch for the entrelac turtleneck this afternoon, and proved to my satisfaction that I can get the required gauge without having to change needle sizes from what the pattern specifies, and that entrelac really will suit the hand-painted yarn perfectly and accomplish all my various goals for this project. I used a single skein for the swatch, of course, so the sample does not show what the mixture of colors & tones will eventually look like, but at least you can see that the yarn and the pattern seem to like each other.

FABULOUS.

I have also wound all the skeins now, and determined that I can group them by color into four categories. There is one especially pale creamy one, three alike that have the creamy background with blue & green leaning more toward pastel, two alike that are mainly light blue as opposed to cream, and three alike that seem to emphasize the darker shades of blue and green. So I will base my color scheme on those ratios (1, 3, 3, 2).

What a difference a day or two can make!! When this week started, I still had a great big pile of lovely yarn and only vague, incohate ideas about what to do with it. Now I have the ideal pattern, a definite game-plan, and every reason to expect that I will start seeing results sooner rather than later. Woohoo!!

Wednesday, June 24, 2009

First Impressions & Almost a Miracle

Earlier this year, I quite frankly splurged to acquire first a single skein of Rio de la Plata Impressionist Merino Pampa in the colorway known as "Spring Bouquet" — and then a full *eight* more to go with it. I know exactly why it was so hard to resist. The fact that it was February (blech) and that I was having a fairly rough semester definitely made me rather susceptible to yarn temptation at the time. But more to the point, this is positively dreamy wool, rich and buttery soft, and the colors are a feast for the eyes. The right sweater made with it will become both a snazzy showpiece and the ultimate snuggle garment, all in one. Mmmmmm.

The Impressionist collection is a Yarn Market exclusive. From what I can tell, they have arranged for several different high-end yarn companies (Lorna's Laces, Twisted Sisters, Cherry Tree Hill, Prism, Rio de la Plata, Fiesta) to design magnificent hand-dyed colorways in various elite fibres, all inspired by the same series of famous 19th century paintings. The artists represented include Monet, Van Gogh, Caillebotte, Sisley, Renoir, and Degas. The designers create their own "impressions" of the paintings' color schemes, and each skein comes with an elegant label depicting the painting in question.

Spring Bouquet (a.k.a. Grande Vaso di Fiori, "Large Vase of Flowers") is a painting by Renoir from 1866. You can see a nice large image of it here. The Rio de la Plata wool yarn named after it is all deep blues and greens and violets on a creamy white background, with occasional tiny flecks of crimson. These are some of my all-time favorite colors, and for my admittedly self-indulgent purposes, it is a good thing that they are not accompanied by either the golden accents or the pale pink that I also see in the painting.

When the second batch of this yarn arrived, I knew that I had just saddled myself with rather a tricky little project. The problem, of course, is that no two of these skeins are exactly alike. Some have relatively little of the cream color and concentrate on the dark blues and greens instead, while others are noticeably paler by comparison, and at least one is almost entirely cream with very little of the darker hues.

As soon as I saw this assemblage of wool, I realized that knitting a sweater in the conventional fashion, i.e. completely using up one skein at a time, would result in uneven blotches of color in odd places and obvious, ugly transitions from one skein to the next. So I decided to take my time & work out a way to switch around between all the different skeins in a consistent pattern throughout the sweater, so as to create a harmonious, balanced effect.

OK, fair enough. But then what pattern to use? For lots of different reasons I emphatically do *NOT* want to knit just straight stockinette. Even with smallish needles to ensure the right density, the fabric would be flat and could easily wear thin in places, and talk about *boring*. The sweater that I have in mind needs to have plenty of "nooks & crannies" to hold in warm air on a chilly day. Most conventional textured patterns, however, even simple cables, would inevitably try to compete with the variegated colors and create visual chaos on a large scale. Not good. I swatched one or two ideas and did not like the results at all. So I stashed the yarn away and told myself that I would just have to wait & think it over. I knew that if I could manage to be patient, the right idea would eventually percolate into my head.

At length I thought of entrelac. And the more I thought about it, the more it seemed to emerge as the IDEAL solution to my dilemma, with just enough structure and interest to make the garment something special, but also enough geometric simplicity to stay unobtrusively in the background and let the colors do their thing without getting in the way. It's also a French word, which simply sounds intriguing and stylish by its very nature, although there are some quite frankly hideous objects that were designed using this technique. Do a quick search on Ravelry for "entrelac" and you will see what I mean.

Now here's the fun part... The day before yesterday, a friend of mine whom I had not seen in person in a long time brought me along to join in a friendly gathering of knitters who meet 2 or 3 times a month at a bookstore in Louisville. I had a bunch of finished objects with me for show-and-tell (including the Wedding Ring Shawl and the Princess), and I also brought the Impressionist yarn to get my friend's opinion. She is very wise in the way of fibre arts (hence her blog handle: The Fiber Artist), so I was delighted when she liked the entrelac idea. And then she made the brilliant suggestion that each "row" of squares in the entrelac pattern could be done from a different skein. The natural tilt of the design, with the corners of each row interlaced with the ones before and after it, would effortlessly tie the whole composition together. And Bob's your uncle...

I came home from that conversation *thoroughly* convinced that we were onto something big here, and yesterday evening as a follow-up I did a search on Ravelry to see what sorts of entrelac sweater patterns I could find. I hoped to confirm that something vaguely like what I wanted had been done before, so that I could proceed to design my sweater with confidence.

What I found instead was *exactly* the pattern that I had envisioned, in a back-issue of Vogue Knitting that I actually happen to own. It's even a turtleneck!! Understand that the odds of this are decidedly in the "not bloodly likely" category, since I have never subscribed to the magazine, and only ever buy it when I run across it it at a bookstore and see something in it that I really like. What an amazing serendipity — almost a miracle — to have just the right pattern pop up, and then to discover that I do not have to do any design work, beyond figuring out the sequence in which to use the different skeins. YIPPEEE!! Time to get out the trusty ole' swift & yarn-winder. I am off to the races.

Monday, June 22, 2009

The devil really *IS* in the details.

What can I say? That thistle panel chart for Peggy Tudor is in a class by itself. I have done a fair bit of complex chart-based knitting in my day — including lace patterns that spread over several pages — but I've never seen anything quite like this. It contains 19 or 20 different symbols, at least half of which seem *specifically* calculated to create left-right directional headaches for someone like me.

Mind you, any malice aforethought in all of this must be attributed to the cussedness of the universe in general and not to the designer. There is nothing wrong with the pattern itself. Indeed the instructions explicitly state:

Reading odd numbered (RS) rows from right to left and even numbered (WS) rows from left to right, beg at row 1 and work the patt from chart A...
As long as you can do that, the chart is perfectly clear and unambiguous, with all the little devilish details put meticulously in their proper places. But as a left-handed knitter I always have to pay extra attention to what I am doing to avoid mix-ups, even with relatively simple patterns. So this is just an extreme case of something that I deal with every day. C'est la vie.

In the course of reworking the first thistle after my last post, I actually identified two more places where I had misread the chart. So I am very, VERY glad to have taken the time to work out all these little kinks at this early stage. Now is the time. It would be rotten to discover problems of this nature with the project any further along, that's for sure.

Here is the new & improved first thistle. It will need careful blocking of course (oh, really?), but I think the knitting is as accurate as I can ever expect to make it. Click on the image, as always, to get a closer look.

Sunday, June 21, 2009

Nobody's perfect, but...

Can you spot it? Look very, VERY closely.

There is *one* tiny mistake in the first thistle that I so triumphantly photographed and put on display in my previous post a little while ago. One itty bitty 2-stitch cable that twisted the wrong way. I only just noticed it myself.

[[ Hint: the tips of the two thistle leaves are supposed to be mirrors, not echoes of each other, and they're both supposed to arch inward toward the stem. ]]

Sigh.

Now what?!

Well... All my well-honed perfectionist instincts are currently screaming. Sometimes I can persuade myself that no one will ever notice, but this time I honestly don't think I can let it go, not right in the first thistle, dead center. It's the principle of the thing, as much as anything else. If I don't fix it, it will prey on my mind, and this is going to be a very long-term project. It's too early in the game for me to tolerate that.

So I think what I photographed earlier today will simply have to count as a practice run, and that I will start over and really make sure to get it right this time. At least I've learned my way around that pesky chart, right?

In piam memoriam, Emmeline Grangerford

Emmeline Grangerford is a character in Huckleberry Finn who writes poems about local people who have died. Her trademark is that she always finds a clever rhyme for the name of the deceased — that is, until a man dies in the village whose name was Whistler. Utterly defeated by this, she is heartbroken and soon dies herself.

We read Huckleberry Finn in middle school English (7th grade, I think), and one of our weekend writing assignments was to compose the poem that Emmeline never could. I remember being totally at a loss until my father thoughtfully came to the rescue with the news that there is a kind of sailboat called a Thistle, which of course would make a person who sails one a "Thistler." Q.E.D.

How on earth can all this have *anything* to do with my knitting??

Well... The Caledonian thistle is, of course, a beloved symbol of Scotland. Since Margaret Tudor's first marriage was to James V of Scotland, in the hope of uniting the two countries, the sweater designed in her honor includes the thistle as well as the Tudor rose as a prominent motif. I was suddenly reminded of Emmeline today, therefore, as I contemplated the first thistle of my Peggy Tudor sweater, happily complete. You may click on the image, as usual, for a closer view.

This is an extremely intricate and tricky pattern, meticulously conceived with extraordinary attention to detail. Stitches are not only knitted or purled, but also twisted or not, and then there are cabled elements as well, with single stitches or pairs elaborately crossing one another on both RS and WS rows — all of which would be perfectly manageable, given that there is a detailed chart, except for the part where I knit left-handed.

Oy, gewalt.

Charts usually solve all my left-right dilemmas, because they can easily be read in either direction, but the symbols on this one were both numerous and specific enough that I had to consult the key to figure out what each one meant. That brought verbal instructions into the game (ALWAYS a potential pitfall for left-right transformations), and then I had to figure out what I was supposed to do at any given moment, depending on (a) which direction the pattern assumed I would be going for that particular row (RS vs. WS) and (b) which direction(s) I was actually trying to go and/or reading the pattern at the moment (since I sometimes follow the chart from right to left while knitting the opposite way). YIKES. It was enough to make my head spin. DYSLEXICS OF THE WORLD, *UNTIE*!!!

In the end, I had to take a quick reality check before each little maneuver. "OK, hang on," I kept thinking, "what exactly is supposed to happen here?" Then I would make the stitches do what the design seemed to demand, rather than worrying about trying to rephrase the instructions to describe what I was doing.

There were a couple of false-starts along the way, and some minor mistakes that I had to tink back and fix, but I finally made it successfully through one entire pattern repeat. Phew. I absolutely love the way it turned out. The Nature Spun gives such terrific stitch definition. But this is definitely NOT a project to be worked on late at night or in an environment filled with distractions. Constant vigilance, constant vigilance.

Ever anon...

Saturday, June 20, 2009

Vindication and *JOY*

O frabjous day...

The long-awaited parcel of NatureSpun sport-weight yarn for Peggy Tudor finally arrived yesterday morning. Yipee!! I lost no time whatsoever, but ripped open the bag and extracted a skein and immediately began knitting swatches. The color is EXACTLY what I wanted. I would call it a true green or emerald green, not markedly blue or yellowish in tone, neither too dark nor too pale. Goldilocks would definitely approve, in other words, as would Kermit the Frog. The wool is dreamy to work with, as I had hoped, being both soft and springy with wonderful drape and plenty of stitch definition to show off the pattern. So while I have no doubt that there will be traditional guernseys in my future (I've already got his-and-her items from Fishermen's Sweaters in my Ravelry queue and a color card from the UK that has my imagination all fired up), nevertheless I firmly believe that I have found the right yarn for Peggy Tudor. My instincts were correct on this one.

The pattern calls for 3 mm (US size 2) needles and 36 stitches x 42 rows to 10 cm, but everyone knows that the designer is a notoriously tight knitter. I encountered quite a few people on Ravelry who had real trouble making the right gauge for this project and was fully prepared to dial down at least two needle sizes in pursuit of the goal. There's certainly nothing like lace knitting to inure a person against any residual fear of small needles!!

Technically, the US needle sizes from 0 through 3 cover the range from 2.0 mm through 3.25 mm, but metric needles actually come in 0.25 mm increments at that end of the scale. So there are really six sizes in that range instead of four (2.0 mm = US 0, 2.25 mm, 2.5 mm, 2.75 mm, 3.0 mm, 3.25 mm = US 3). Conversion charts define US size 1 and size 2 in different ways, but at any rate my size 2 needles happen to be 2.75 mm rather than 3.0 mm. I started with those, then, to see how close to the required gauge I could get with just one metric size smaller than the pattern say. Afterwards, for good measure, I knitted a second swatch using 2.5 mm needles. Here is a photo of the two, taken in natural light (2.75 mm needles on the top, 2.5 mm on the bottom). Click on the image to bring up a larger version.

Now, the second swatch is visibly narrower than the first because it has fewer stitches across, but despite repeated attempts I cannot measure a difference in gauge between the two. Both come out to 34.5 stitches x 43 rows to 10 cm. Happily, I believe that this is close enough to the specifications. My body measurement is right on the cusp between a small and a medium for the pattern, which means that I can knit the small size at my gauge and have it come out just about right. I am also reassured by the fact that the swatches are both a bit too wide and not quite tall enough. Careful blocking at the end can easily pull the finished piece to be slightly longer and narrower, if necessary. There is definitely plenty of give, and although I wetted each swatch and stretched it with my hands while allowing it to dry, I did not use any pins, because I wanted to see what the gauge would be in its "natural" state.

I have looked at both swatches from all sorts of different angles and under different lighting conditions, trying to make up my mind about which needles to use. It is not an easy call, but because the measurements are the same, the decision comes down to the look and feel of the fabric. Here are closeup pictures of both swatches for comparison: 2.75 mm needles on the left and 2.5 mm on the right. Click on either one for an even closer view.

I think I could honestly go either way and not be disappointed, but the 2.75 mm needles felt more comfortable with the yarn as I was knitting and I think I prefer the stitch definition somewhat too, even though I have to admit that my eyes keep going back and forth.

So I am going to cast on this afternoon with the 2.75 mm needles. The sweater is knitted in narrow vertical panels that are then carefully sewn together (5 each for the front and back and 3 for each sleeve). If I get part way into the first panel and do not like the way it looks, I can always start over with the 2.5 mm needles and not worry about having to rip out a great big piece.

Whatever happens, this is going to be *FUN*.

Sunday, June 14, 2009

How the @#%$&!! did the La Brea Tar Pits end up in my closet?

[[ This post was supposed to appear last Friday, before it got hijacked by the image-handling crisis. Fortunately its contents did not come marked with an expiration date. ]]

The past few days have witnessed a momentary lull in needlework activity around here, because I've been so busy cavorting all over the Internet, exploring Ravelry & discovering new knitting blogs & online yarn retailers, that I have't done any real *knitting* to speak of. I'm also still waiting for my NatureSpun yarn for Peggy Tudor and a bunch of new patterns to arrive. Patience, patience.

Be that as it may, I still have a blog-worthy story to tell, in that a few days ago I finally came to grips with my untidy stash of yarn and sewing fabric. The reference in today's title to the famous archaeological site at Rancho La Brea in the Los Angeles area is by way of being (a) an hommage to Bugs Bunny, a childhood hero whom I distinctly remember mentioning the tar pits more than once, (b) a nod at the parallel universe where I became a paleontologist, and (c) a signal that we are talking here about personal ARCHAEOLOGY. Digging through layers and layers of my needlework history, rediscovering the past, clearing away mounds of debris, and getting more than a little bit dirty in the process.

Take a minute to savor the imagery. Tar is sticky. It oozes and occasionally makes a sound like "blorp". It adheres to any surface that happens to come into contact with it. It even grabs hold of defenseless animals and refuses to let go. If they cannot escape, they grow weaker and weaker until they eventually die, and their remains are sucked into the tar and preserved remarkably intact. For centuries. Millennia. Thousands of them. Future generations discover the vast deposit and build a glass enclosure around their field laboratory, so that tourists can come and watch the archaeologists at work as they uncover one fascinating specimen after another...

So this is about exploring my own personal tar pits. Call it "La Brea on the Ohio," if you will. And instead of ferocious saber-toothed tigers and dire wolves, the objects being unearthed in my little neck of the woods are skeins of yarn and pieces of fabric. Some of these are still whole and have never been touched since the day they were purchased, but there are also remnants, LOTS of remnants, from previous projects.

You will know whereof I speak, if you are a needlework person yourself, or have ever shared or even just visited a home where such a person lives. Stuff accumulates. For instance, see this recent blog post from a like-minded soul who recently went through a similar cleanup.

My stash notionally lives in a certain closet next to my sewing table, although in recent months it had begun slowly taking over the rest of the house. There were bags and boxes and bundles of yarn and fabric *EVERYWHERE*. It had finally reached a crisis point not long ago, and the need to remedy that situation and reclaim valuable real estate was a big part of why I decided to roll up my sleeves and launch a full-scale excavation.

Another factor, of course, was joining Ravelry. I hadn't taken an inventory of my stash in years! Going so far as to compile an itemized list of every yarn that I own and posting it on my Rav-profile is something that I know I won't get around to for a long time, if ever, but I was curious about what hidden gems I had tucked away and forgotten.

In addition, I am expecting the imminent arrival of a bunch of fabric from my mother's sewing stash. She moved into a retirement complex about a month ago, and although she took her sewing machine with her, she does not have storage space for much in the way of superfluous yard goods. So I am inheriting certain items that she acquired long ago and never used. Best to clear the decks and make room here *before* the onslaught.

I do not have a photo of what it all looked like before this process began, because it was just too depressing. I could not bring myself — nay, it did not even OCCUR to me to take any pictures. Why would anyone want to look? So, dear reader, I will do my best to describe what it was like, and you are simply going to have to use your imagination to fill in the rest.

I should say in my own defense that I had not neglected the need for organization altogether. Years ago, I had acquired several large(ish) stackable plastic bins which can hold a lot of stuff and sit neatly & unobtrusively in the closet most of the time. To do them credit, I have to say that they have done a pretty good job of keeping the stash contained and stopping it from taking over too much of our living space. But all the same there have been certain annoying and seemingly intractable problems...

First of all, the bins in question were opaque, which is splendid for preventing damage from sunlight, but absolutely hopeless from the standpoint of ever trying to find anything on demand. The operative verb is *rummage*. I would periodically go through and try to organize the contents in such a way as to keep the most frequently used items near the top of the pile (where I could theoretically get at them). More to the point, I would always relegate toward the bottom of the pile anything I felt reasonably certain I was not going to want anytime soon. But I could never for the life of me manage to remember what was where, which meant dismantling the closet and going through the entire stack, opening bin after bin in turn, practically every time I simply wanted to retrieve a particular skein or fabric sample.

It was a terribly clunky and inefficient system beyond a doubt, and on the not-too-frequent occasions when I actually had to dive in and try to hunt for anything from the stash, I would grumble and curse and tell myself that one of these days I should really find a better way of doing things. Such urges are infrequent, though, & quickly pass. I have a busy life, and the bins were managing to keep the chaos reasonably under control. So months and months and even years went by without me really either noticing or needing to take any immediate action.

Now go back to the tar pits idea and imagine something that starts out, innocently enough, as a collection of yarn that's mostly in bags, although some skeins are floating around loose, and fabric that's likewise either folded (if unused) or else in a bag of loose remnants. What happens when you rummage through that collection over and over and over again, for YEARS, and do not always put things back as neatly as they were when you found them?

Each time the stash is disturbed, items are displaced, reshuffled, and/or intermingled with the surrounding material, and then everything is allowed to settle again for a while. Repeat this process many, many times over an extended period, and the result is a unique form of multi-layered chaos. Every distinct layer has a discernable center of mass separating it from the others, but the boundaries between the layers become increasingly fuzzy and hard to identify. Slowly but surely, the situation devolves.

Add that to never-ending challenge of opaque bins, and you should have a fairly good idea of what I was facing last weekend as I screwed my courage to the sticking place (tar pits, remember?) and set myself to work.

I will try not to belabor the subsequent narrative, except to say that I...

(a) found some translucent bins that we already had and switched out their contents, which did not need to remain visible, so that my stash could take up residence in them,

(b) emptied the existing bins and bags and boxes and bundles, one by one, onto the bed, so that I could sort through things and (re)group any items that had gotten separated from their proper cousins,

(c) got rid of ~10,000 dingy & decrepit plastic and occasionally even paper bags (some literally dating back 20 years or more!!) that had been used to house stash items, and replaced them with lovely new clear ziploc-style ones, which I had bought in bulk in several different sizes,

(d) separated yarn from fabric and whole skeins/yardage from remnants in both categories, and finally,

(e) loaded the fabric into several long, flat bins (*ideal* for the purpose), and the yarn into several taller ones.

I needed about a day and a half to complete this complex task. It was completely CATHARTIC, and an enormous RELIEF to see the new system take shape.

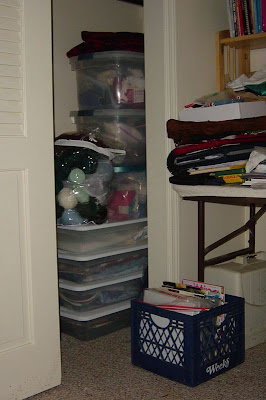
Here is a photo of the closet now, with the yarn bins stacked neatly on top of the fabric. You can also see the milk crate by the door with all my knitting magazines and loose patterns, which I had sorted through a few days earlier. I even put sticky notes on the cover of each magazine listing the projects that had caught my eye with their page #'s and a quick identifier. No more leafing through stacks of back issues in search of a particular pattern! *Grin*.

Oddly enough, I found out that I had accumulated rather less than I imagined. That was very reassuring, I must say, and useful for silencing any lingering guilt over purchases long past.

Going through all the old remnants brought back lots of fond memories too. Don't get me wrong: I have definitely had my share of unsuccessful projects over the years. But most of them are long gone, and I managed to salvage the good parts of the few that remained and get rid of the rest. So there's nothing left in my stash now that I can't honestly hope to use someday.

Or at least that's what I am going to keep telling myself. Hehehe.

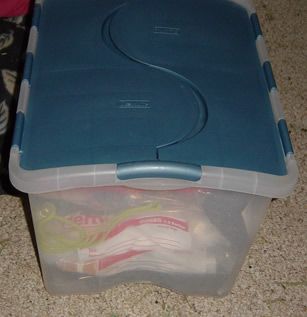
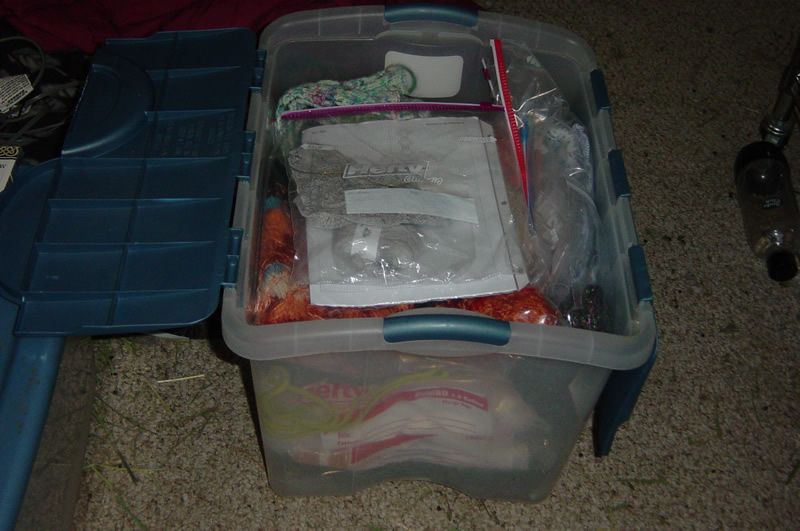
Last but not least, I commandeered a special bin for my knitting WIP's. These have a pernicious tendency to sprawl and scatter themselves throughout the house, as any knitter knows, so I was delighted to come up with what I think will be a marvelous solution.

The bin in question has an attached lid in two halves that that swing open from hinges on either side and then interlock in the middle when closed. I can now get at the items that are on duty quickly and easily, without having to dismantle the whole long-term storage system to hunt down and retrieve them. It an amazing and wonderful feeling to have it all handy in one place, and to know that the bedroom and living room and study, etc. are now safe(r) for human habitation again.


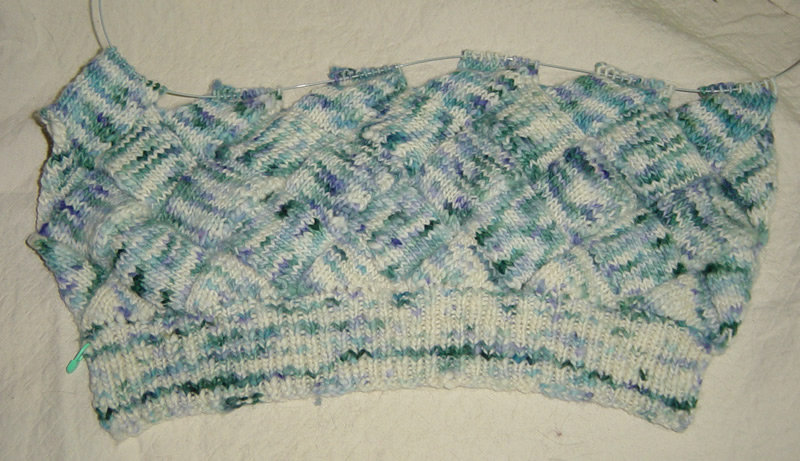
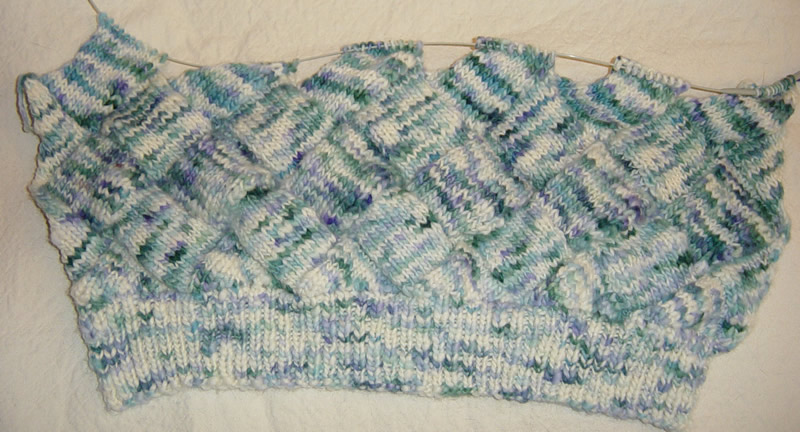
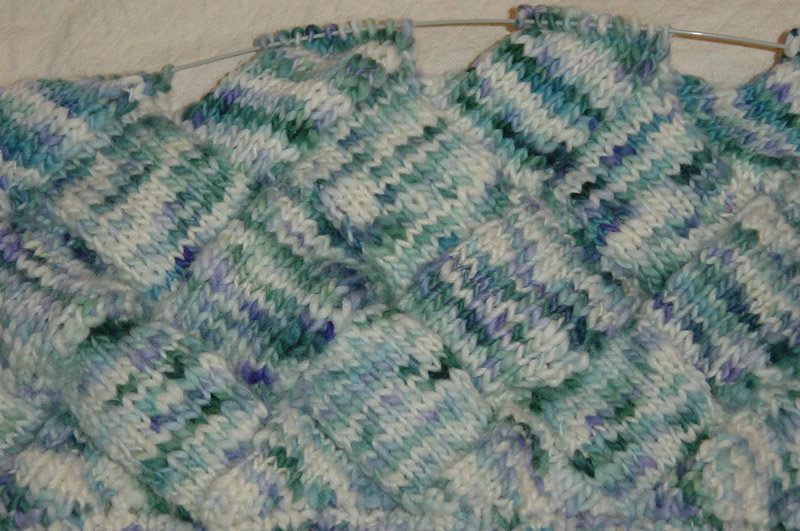
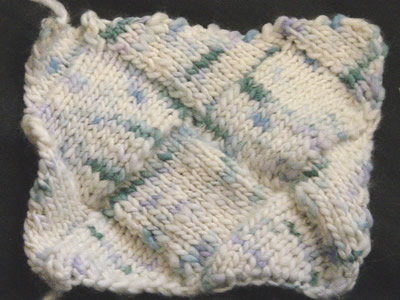
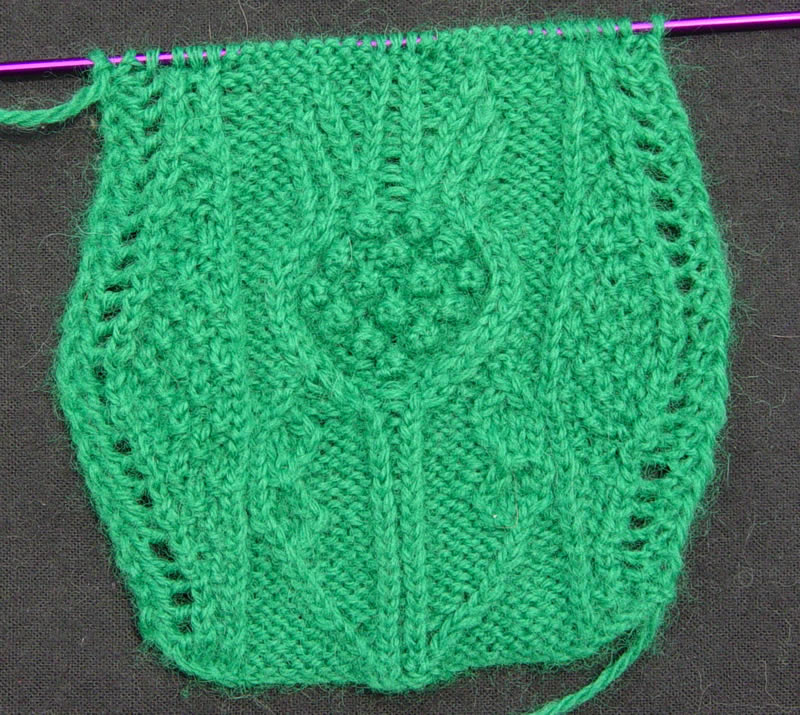
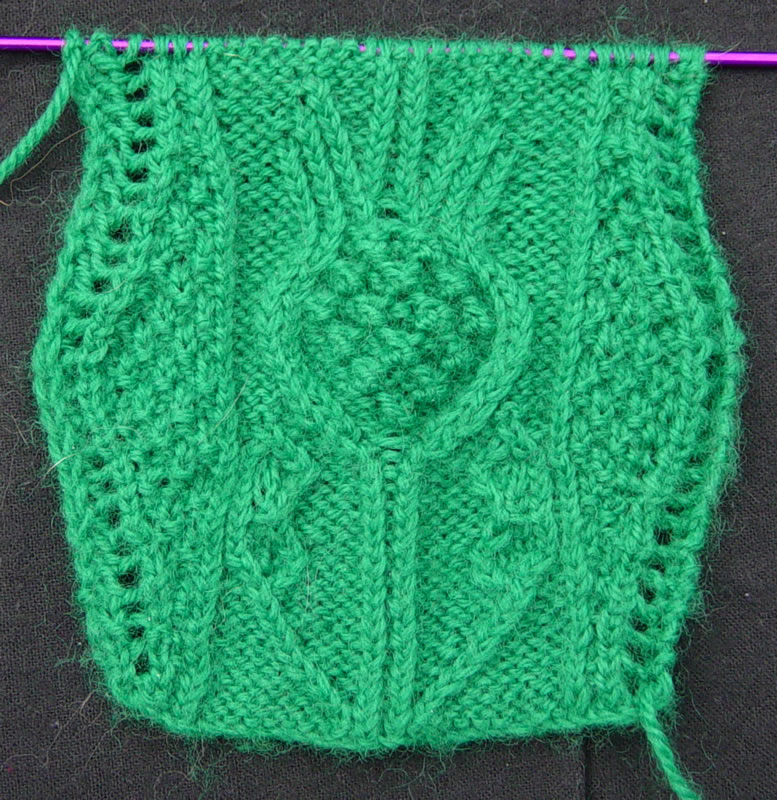
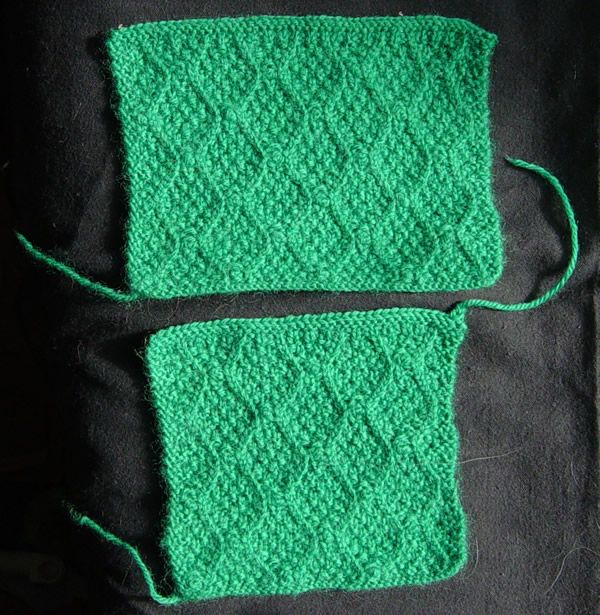
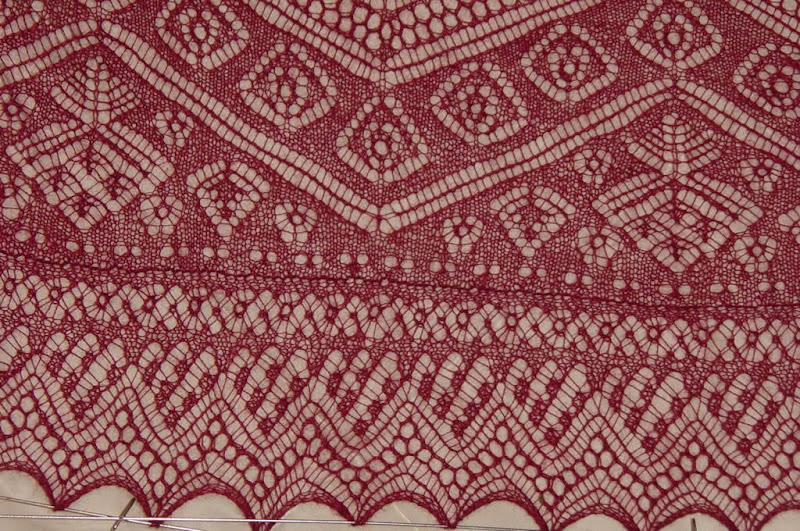
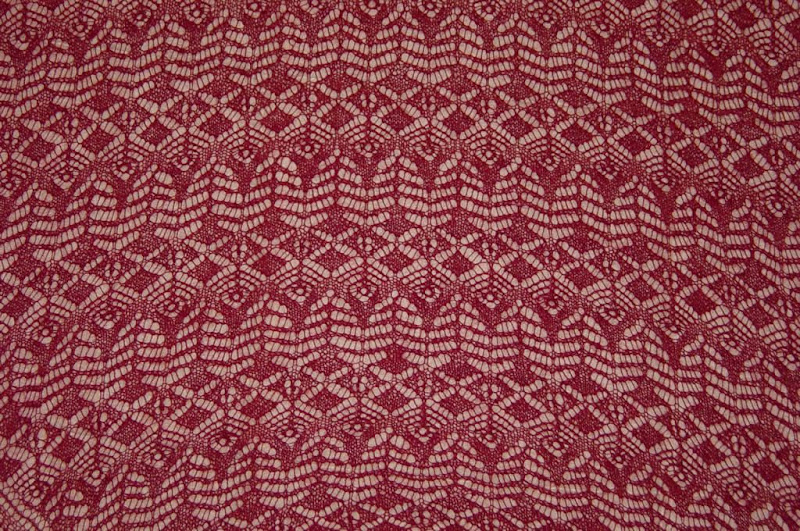
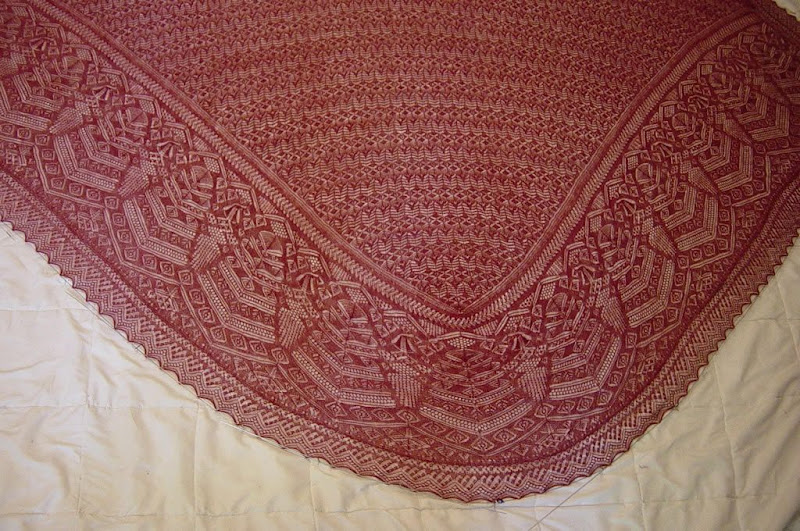
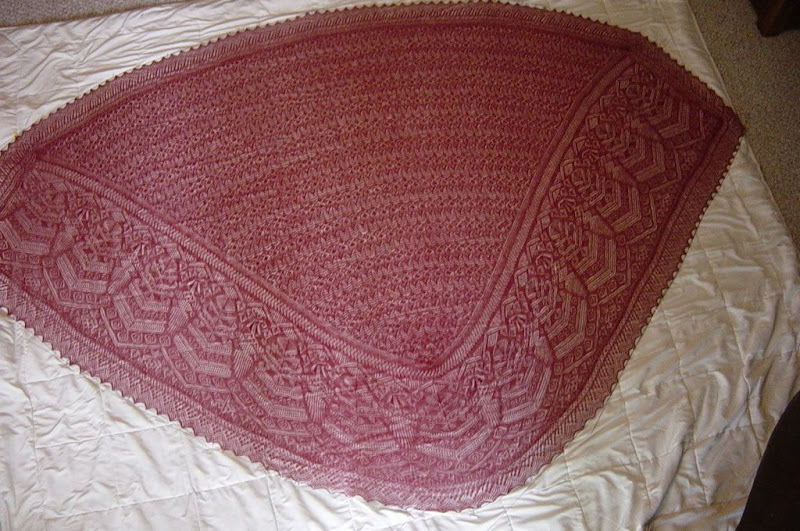
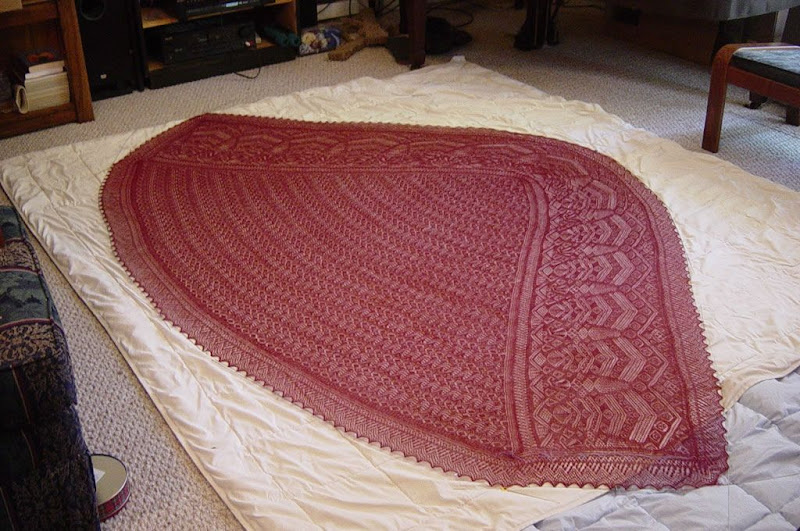
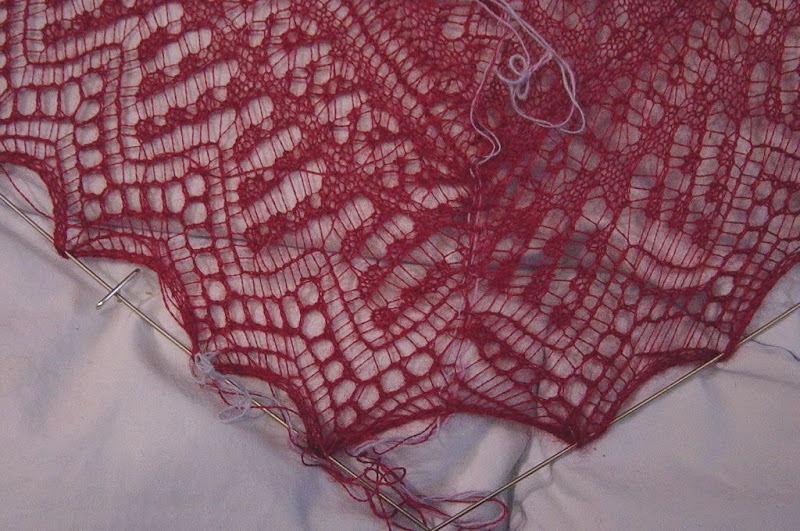
That's the WIP bin neatly closed. See how cleverly the two halves of the lid interlock? And here is the same bin invitingly open. That's my Unst Stole right on top, with the Frejya sweater underneath. :-)


Makes you want to dive in & start knitting, doesn't it? And now I can sit as I do just that, while I gaze contentedly at my stash, thinking about past adventures and future possibilities. Mmmmm.... All that fuss was DEFINITELY *WORTH IT*.

Back in Business

Up & running again. *Phew*. It's been a busy few days around here...

  • My programming-savvy spouse helped me modify the Blogger template a little. No more irritatingly wide margins! The actual text area is still only 600 pixels wide, though, so even those with relatively low monitor resolution should be able to focus the browser on the right side of the page and scroll through all the posts. Please leave a comment and let me know if I am incorrect in that assumption.

  • I got my seven web-rings authenticated and all the buttons and links in place. They make me happy.

  • I organized my online photo albums and brushed up on enough HTML to take better control of how pictures appear in the blog.

  • And while I was at it, I came up with a way to use my favorite web-authoring software to manage all of my blog posts at this end, so that I can compose off-line and keep my own archive. Good thing I didn't wait any longer to make that last part happen, because going back through and retrieving clean copies of all the posts one at a time was laborious enough as it is. The task would have been completely daunting, had I not started now with the blog still in its infancy.

Mischief managed — and now on to more important things, like knitting and occasionally writing about it.

Friday, June 12, 2009

"We are experiencing operating difficulties. Please stand by..."

Dear Readers,

I am currently engaged in certain unpleasant but much needed housekeeping activities behind the scenes that will have an adverse effect for a little while on the appearance of images in this blog.

Your browser is not malfunctioning. The issues are on this end, but they should be only temporary. Please bear with me. I expect to have everything back up & running smoothly again in a day or so.

Thanks,

MRPP

Wednesday, June 10, 2009

Hesitation, Resignation, *Determination*

[[ Is the rhetorical pattern to these most recent post-titles painfully self-evident yet? I do sincerely apologize to those readers with delicate literary sensibilities who might be wanting to throw something at the computer screen (or better, at *me*) right about now. Words are just so much fun fun FUN for a person like me that it's easy to lose control. ]]

I have just been called out on my previous post, via Ravelry mail, by a friend with a lot more experience than I have at knitting traditional fisherman's guernsey sweaters.

Simply put, she does not think that the Nature Spun would be a good yarn choice for Peggy Tudor. A self-avowed purist, she firmly believes that there is simply *no* substitute for a genuine 5-ply traditional guernsey yarn like the designer's own yarn (for which the pattern was written) or this other authentic guernsey wool (both links repeated from my previous post). I should emphasize that she wrote to me not in the spirit of criticism but rather out of genuine concern and wanting to see my project succeed. She even offered to send me a sample of the "real thing" from her stash, just so that I can see and feel the difference before making up my mind.

I have since edited the post in question to prevent further misunderstandings. But I originally wrote that my yarn would be "just like" the traditional guernsey, which I openly admit is neither a true statement nor what I really meant to say, and it was to that bald pronouncement that my friend was mainly reacting. The new version — hoping that my yarn will be "enough" like the others "to meet my specifications" — is a much more accurate reflection of my real thinking. In point of fact I have never seen or handled the traditional guernsey yarn, only read about it, so I do indeed have much to learn. And in addition to awaiting the yarn sample from my friend, I have also taken the step of ordering a proper shade card & sample pack from the manufacturer to help relieve my ignorance further.

But all that having been said, the important thing is that I *do* think the Nature Spun is bound to be more like a traditional guernsey yarn than the single-ply Brown Sheep yarns (Top of the Lamb or Lamb's Pride), which I considered first. Only the former comes in a sport-weight variety, as it happens, but even so the nature Spun was a come-from-behind winner, largely because of the availability of the proper shade of green that I wanted. The potential advantages of its 3-ply texture came as a delightful afterthought. When I saw that and superficially compared it to the guernsey yarn, I got a bit carried away in my exuberance at having found what looks like *just* the right balance between authenticity, drapiness, and economy.

So... I am resolutely going to give my alternative a try, because I think it might work. We shall just have to wait & see.

Nature Spun sport-weight may not be as dense and tightly wound as the authentic guernsey yarn, and that may turn out to be a fatal flaw, but I am nonetheless still eager to find out how it will behave when I start to swatch it with the Peggy Tudor pattern.

*IF* I can get the right gauge without too much hassle, and...

*IF* I like the look/feel of the resulting fabric...

I will move forward — full steam ahead — with no apologies to anyone.

Quite frankly, what's the worst that could happen? The bottom line in all of this is that even if the Nature Spun turns out to be completely wrong for this particular project, I would simply end up with great load of yummy green wool to use for something else. It will definitely not go to waste!! Meanwhile, the "echt object" is readily available, and I can always decide to order it at a future date, should I see fit. But we will burn that bridge only if/when we get to it...

Meanwhile, I do not see my friend's challenge as a true setback. Not by a long shot. I still have that date with Peggy Tudor. :-)

Inspiration, Deliberation, *Anticipation*

Every so often, as a needlework junky, you come across a design that stops you dead in your tracks and speaks to you with a profound sense of recognition and belonging. Helloooo, says a little voice in your head (presumably in reply to the object of desire that, as I said, has already started the conversation), I need you in my world. We can make rapturous music together...

That's what happened to me a week or so ago, when, after many years of knowing it was out there but never having seen it, I finally got ahold of a copy of the book Tudor Roses through ILL at my local public library (it came to me all the way from Carson City, NV!!) and first laid eyes on this *remarkable* sweater. The designer has been a familiar name to me since 1988, when I was still in college and her encylopedia of fair isle patterns made me realize just how wide and wonderful the world of knitting truly is. Long out of print and coveted on ebay, that wonderful resource is now scheduled for re-release, and I heartily recommend it to anyone interested in colorwork patterns.

But back to Tudor Roses: the instant I turned the page and saw the photo, I knew somewhere down in my bone marrow that Peggy Tudor and I have a date with destiny.

So I've been shopping around for the right yarn ever since, hoping to get going right away on what can only be a LONG-term project.

See the paradox? The thing is this: I am eager to start soon, but then I intend to take my time, in order to savor the whole experience and to let CRAFTSMANSHIP be my byword, rather than something more like EXPEDIENCY.

I wanted 100% wool or a mostly wool blend, probably in a dark green color (although royal blue, dark purple, and blood red were heavy contenders too). It imagined something resilient that will also drape well, with excellent stitch definition to show off the pattern. And, to top it all off, I didn't want to spend a lot of money on something fancy and imported if I find the right high-quality material made right here in this country. My sister-in-law comes from a sheep-ranching family in Montana/Wyoming, so I have a personal tie to the home-grown wool industry.

Last night, after the acquisition and careful scrutiny of several color-cards (examined at various times of day under different lighting conditions, etc.) and lots of web-surfing and mulling over various options, I finally came to a decision. And today I ordered 18 skeins of Brown Sheep Nature Spun sport-weight wool in shade #24, Evergreen.

Nature Spun sport-weight is a springy 3-ply 100% wool yarn. My hope is that it will be enough like the designer's own yarn (for which the pattern was written), or this other traditional 5-ply guernsey wool from the British Isles, to meet my specifications. The really good news is that NatureSpun is available in the US at a fraction of the cost. Even with tax & shipping I paid less than $85, rather than $150+, and in these economic times one can't be too careful.

I think the sweater will look spectacular in a dark, rich true-green (not too bright or too yellowish or too teal), which has the fringe-benefit of being a favorite color of mine that is decidedly under-represented in my sweater wardrobe. When all the knitting and the careful sewing are done, this is the type of garment that I am going to want to wear, and wear often.

I never ceased to be AMAZED amazed by the power of the Internet to facilitate commerce. And now comes the best part: watching the mailbox for my goodies to arrive. :-)

Monday, June 8, 2009

Royalty is a tough act to follow, but...

I think I may have mentioned it once already, but I am *addicted* to the CashSilk yarn. I feel as if I'm chain-smoking with this stuff, even though I've never held a lighted cigarette in my entire life. Here's what I mean: as the Princess Shawl was nearing completion, I made sure to order my next installment of CashSilk so that it would arrive in plenty of time before I finished, and I cast on for the new project literally less than 24 hours after the washing & blocking extravaganza described in my previous postings. I've pretty much resigned myself to the fact at least for now that I simply MUST have one CashSilk project on the needles at any given moment. No more than one at a time, certainly, but at least one, always. That's just how it is.

But where to next? I mean, how on earth do you follow up on something as splashy and ornate and over-the-top as the Princess?

Well, for one thing, LESS IS MORE. I was ready for a project on a smaller scale, where I could enjoy the forgotten pleasure of knitting with less than 200 stitches across and actually see progress on an hourly basis rather than having to wait days or even weeks for my effort to produce a measurable difference. I also wanted something that I could actually expect to wear. Occasions that would call for a lavish garment like the Princess shawl are few and far between in my world!!

So for a bunch of different reasons I chose the Unst Stole from Sharon Miller's book Heirloom Knitting (p. 261). It's just the right size for my purposes right now as a "Princess knitter in recovery," and I've always loved the design, especially the scrumptious border (also seen on this shawl pattern, which is the first in Sharon's collection and a very close cousin of the Unst stole).

Oh! And I almost forgot to add that a new colorway in the CashSilk was released just in time for this project. It's called Platinum, and as a sterling silver jewelry fanatic, I adore this alternative to the pearly white yarn traditionally used for fine lace. The moon-glow gossamer thread is like knitting with a strand of mithril. Fabulous.

Along the way, while laying the groundwork for this project and reading through the book, I started exploring the possibility of designing my own lace shawl(s) someday, based on the traditional motifs. To that end, Heirloom Knitting is a wonderfully *RICH* resource, containing not only an extensive individual pattern library (centers, borders, edgings, and grids) but also various tools and guidelines to help ease beginners into the complexities of designing whole elaborate pieces. Sharon addresses such topics such as the selection and layout of patterns and techniques for the construction of various shapes (e.g. borders-inward vs. borders-outward), as well as aesthetic issues like balance, symmetry and proportions & how to do the necessary calculations too.

These design discussions are specifically aimed at the novice and so remain very much on an introductory level. Indeed sometimes their tone almost verges on the coy or flirtatious. For they seek to spark curiosity and inspire creativity, rather than to instruct in any detail. But since I have never designed my own lace before (having only ever followed patterns written by other people), they were pitched right at my level and I have found them very evocative. There are certain pages that I find myself turning to again and again, and each time that I do so, my understanding and appreciation grows deeper toward those who do design their own lace patterns.

Lately I have been particularly taken up with the concept of "frames," i.e. narrow patterned bands that serve to highlight and embellish the transition from center to border on a shawl. These intriguing design elements can appear singly or be layered several deep in a concentric fashion. There is a photo of an antique shawl on p. 216 of HK that I just can't seem to get out of my mind for some reason.

So I decided to try my hand at tinkering with the Unst Stole pattern a little, to see what it felt like to take some control over the design of a piece of lace.

I drew some confidence from the fact that this is a rectangular stole, with the two border panels placed (from the knitter's perspective) on the top and bottom of the center panel. All three of these elements are worked straight back and forth with the same number of stitches across throughout. No increases or decreases to keep track of or picky mitred corners to work out. That made it easier for me to take my first few tentative baby (or perhaps toddler steps) in the design direction.

There are some big decisions left that I will have to make at some point down the road, but here is what I know so far about my modified version of the Unst stole:

1. I decided to keep the original count of 185 stitches across for the center & borders, despite the small gauge of the CashSilk. One or two posters on the HK Yahoo Group suggested that their shawls, following the pattern as written, came out less long-and-skinny (i.e. with rather more width and less height) than they had hoped, so I did not feel any call to widen mine.

2. The layout of the stole precludes a 4-sided frame, but I thought it would be fun to experiment with a narrow band at top and bottom of the center panel, separating it from the two border panels. Using the mirrored version of the fern motif (p. 90), which is a cousin to certain visual elements found in the existing pattern, I decided to place a row with the ferns facing one way on the bottom of the center and another with the ferns facing the opposite direction on the top. I followed Sharon's instructions to do the math for the pattern repeats, and was pleasantly surprised to discover that the ferns would fit exactly when spaced only 3 stitches apart. I simply placed 6 rows of plain knitting and a break pattern row both above and below the fern motif. Nifty!!

3. Looking at various pictures of the Unst stole as knitted by Sharon Miller and others, I have always thought that the spider-hole lozenges appearing in the center pattern between alternating bands of spider webs look too square and boxy, allowing the webs to dominate the pattern rather more than I would like. So in order to achieve more of a balance, I decided to elongate them by incorporating 3 spider holes into each lozenge instead of 2.

4. Just for the fun of it, by way of introducing some additional complexity and visual interest, and with encouragement from Sharon Miller herself (offered via the HK Yahoo Group), I also decided to alternate bands of the traditional pattern known as the "Shetland Twins" (HK p. 139). After some charting & based on the arithmetic, I decided to make the lozenges for the Shetland Twins pattern contain 4 pattern repeats to balance the height of 3 spider holes. In fact, as it turns out, the Shetland Twins lozenges come out two rows taller than the spider-hole ones. Better that than 3 rows shorter, so there you are.

5. As of right now I am still not sure how many repeats of my extended pattern will be required to achieve the desired effect. It will be a choice between 9 total bands of lozenges (i.e. 5 of spider holes and 4 of the Shetland Twins) or 11 (one more of each type, i.e. 6 and 5, respectively). Depending on the ratio of width to height when the center is complete, I will most likely add to the borders as well, rather than keeping them the same size and letting the center account for any increase in the overal dimensions of the finished piece (as it did in my Princess shawl). If/when this happens, I will simply continue the existing diamond-shaped trellis grid and repeat three out of the four "filler" patterns in the reverse order: those patterns now go ABCD, but I would do them ABCDCBA.

6. Last but not least, while I am at it with all these other modifications, I will definitely choose my own edging as well. I have never much cared for the original one, with its chunky squares of plain knitting.

Well, that's all for now. Here are two pictures of my Unst Stole center as a WIP. The first one shows the bottom "frame" and the second is a closeup of the modified center pattern. As usual, just click on either image to see a larger view.


Things the Princess Shawl Taught Me

A week or so after blocking the Princess shawl and watching its stunning transformation into a finished object, I typed up a reflective piece and posted it on the Heirloom Knitting Yahoo Group. This sort of thing really ought to go in a blog, of course, but at the time I had not yet begun one. So now, having rectified that inadequacy, I would like to reproduce my thoughts here, ever so slightly edited and retouched for broader consumption.

I have often said that one of the things I love most about knitting is that it not only gives my “fidget energy” something productive to do, but also helps me think. The Princess shawl was a big enough project to offer *ample* opportunity along those lines. It taught me what I see as a number of important lessons too. I have been meaning for a while to write down some of my thoughts, partly to give others the benefit of them (such as it may be), and also in order to make them stop swirling around in my head. Some of the points I want to make are highly technical in nature, while others are more speculative and philosophical. Some I am expressing here for the first time, but others have been alluded to elsewhere and to my mind bear repeating.

At any rate, please take these pronouncements for what they are worth, and no more. They certainly reflect my current attitudes about lace knitting, but they may or may not apply to other people, or even to me later on, when I have more experience under my belt.

1. Changing the width of a border panel (i.e. the # of horizontal pattern repeats) on a shawl without also adjusting its depth (i.e. the # of vertical rows it contains) inevitably means that the center pattern must become proportionally a larger part of the finished shawl.

If you compare my Princess to the one pictured on the HK website, you will see how much more of mine is taken up by the center triangle. I knew this from the moment when I made the decision to add the two extra border feathers, and was continually reminded of it all along the way. The center took me *9 months* to complete, including most of the summer and the whole winter break, when I was not teaching and had lots of extra time to knit. That is a long time, and it felt like even more because each row was also steadily wider than the last. It was like the fable of Achilles and the tortoise: I knew I had to be making progress, but instead of getting closer and closer the target kept retreating into the distance.

2. Gauge is vital, because lace needs room to breathe – especially with an extremely fine yarn like the CashSilk.

When working a lace-hole pattern, such as on the Princess edging, one is often expected to knit and purl into a single yo. With the CashSilk, I always wrap the yarn around the needle twice when making the yo in those cases, so that there is enough give in the fabric to accommodate the knit-and-purl.

3. When picking up stitches along the inner side of a lace edging (or any other knitted edge), pull the yarn through only a single strand between ridges.

This seems entirely self-evident to me now, and if you read Sharon’s instructions in the HK book closely, you’ll see that she spells it out in no uncertain terms. But back when I finished the initial edging strip for the Princess and turned to pick up the stitches for the border, I unthinkingly reverted to a technique appropriate to heavy wool sweaters rather than lace, and pulled each stitch through two loops instead of one. Relying on only one gossamer strand would have made me feel insecure! So I ended up with a visibly chunky band at the transition from edging to border, which tended to pull the fabric together horizontally along the seam. By the time I noticed this, however, I was already well into the ornate border pattern and could not bring myself to go back and fix it.

Fortunately, this particular sob-story has a happy ending, since the process of blocking the shawl did a great deal to mitigate the effect along the lower edge. Those edging points stand out perfectly well now with no visible bunching. And of course on the upper portions I had learned my lesson and was able to follow the proper single-strand technique. So if I had it to do all over again, I would adopt a different technique, but it did not turn out to be a fatal mistake.

4. Embrace the wisdom of taking things in stride. Accidents happen, and people make mistakes. But every mishap is a learning opportunity when seen correctly. Never be afraid to take a few steps backward now and then along the path. It’s all part of the journey. But – and this is the crucial thing – learn to fine-tune your responses to the nature of the difficulty.

(a) Experience has taught me unimagined skills at on-the-spot repairs. The trick is to remain calm and yet react quickly, in order to minimize the damage. When I first started making lace, dropped stitches almost always sent me straight into the “frog pond” (as the saying goes), but by now I have learned to catch most of them right away and prevent them from cascading.

(b) Taking lace off the needles should be the very last resort. I would never do it unless I had a lifeline in place and literally no other choice, because picking up all those little loops in the violated fabric is a sure way to madness. Tinking can become as much of a finely honed skill as knitting, and can teach you a great deal about how patterns are constructed. Un-making is a natural part of the creative process. I have placidly tinked as many as 14 or 16 rows of >1,000 stitches each. Over the span of months or even years that it takes to complete one of these huge lace projects, a few days of retrograde motion here or there really doesn’t amount to very much, and there is immense satisfaction in wiping away all the traces of a mishap and seeing them replaced with the pristine pattern. It means that God is in His heaven and all is right with the world.

(c) But sometimes the damage is just too great. When all else fails – as it inevitably will on occasion – it is the better part of valor to go back to the drawing board and start over again from scratch. Even this dreaded eventuality should be welcomed as a second chance, like having a whole new and unexpected lease on life.

(d) Know your own limits and learn to take things in stride as they come. When the world goes unexpectedly sideways or a project "turns pear-shaped" on you, despite all your best efforts and intentions, quite often the best thing to do is take a deep breath and move on. Sharon Miller has often commented on the remarkable willingness displayed by the antique Shetland lace knitters to make adjustments to their patterns on the fly, e.g. by inserting extra decreases or increases here or there.

There was a time when I would probably have balked at this idea as an excuse for shoddy workmanship, but it is all a matter of proportion. For instance, the Laurel Leaf pattern at the top of the Princess border is supposed to reduce the number of stitches on the needle by exactly 25%. I had carefully done the math so that I knew precisely how many stitches to expect. Yet although there was no visible flaw in the pattern, the number of stitches that I actually got was slightly off (776 instead of 765). The Laurel Leaf is a tricky affair. It would have been a major headache to try and undo it. So I left it in place exactly as is, and simply recalculated the stitch-count for the center triangle. No harm done. Perfectionism can be over-rated, and life is short.

5. Let’s face it: lace-knitting is a specialized hobby. But community makes ALL the difference.

Some of my happiest hours alone have been spent knitting, but it is historically and fundamentally a social activity. Think of all those old photos of women in groups, doing their needlework together. We learn from each other and draw strength, encouragement, and inspiration from sharing the journey.

I could probably have completed the Princess shawl in splendid isolation, relying on nothing but Sharon’s instructions and my own ingenuity, but the process would have taken much longer, turned out far worse, and not have meant anywhere near as much as it did with the support and encouragement of this group behind me. Most of the people I live and work with – even the knitters among them – tend to regard my lace-knitting as an eccentricity to be greeted with a mixture of awe and disbelief. Even if they don’t express their feelings aloud, you can see them thinking, “Who would want to do a thing like that?”

That's why I value the Internet community so much. The people I have gotten to know via the HK Yahoo Group, and more recently on Ravelry, not to mention out here in the blogosphere, have made all the difference in the world. How magnificent and precious and reassuring it is to find fellow enthusiasts, who understand what this whole craft is all about and who have so much wisdom and understanding among them.

I’ll never forget how one such person came heroically to the rescue when I was struggling with calculations for the bottom edging of the Princess. I had gone off in quite the wrong direction altogether with various wild and confused ideas swirling around in my head, but she calmly ran the numbers and came up with a simple scheme that made perfect sense and yielded terrific results.

That’s what friends are for.

Thank you, thank you, thank you all — and that goes out to my new blog readers as well as all the old Yahoo Group acquaintances. I feel as if my own adventures in lace-knitting have only just begun. Ever onward!! As the poet Horace said: “life is short, but art is LONG.”

Princess Gallery

The Princess shawl is such a complex and intricate design that I simply can't resist posting some more photographs to showcase a few of its most striking details. Click on any image to see a larger view. Enjoy!


Mmmm. GOSSAMER.

Metamorphosis (a.k.a. Blocking the Princess, Part II)

Metamorphosis is a Greek word literally meaning "change of shape" or "transformation" (which is simply the Latin derivative for the identical concept).

Believe it or not, my Princess shawl is still evolving.

Every other piece of lace that I have ever tried to block was square: pull the edges out straight, watch the corners, and that's it. You're good as gold. The irregular shape of this object made for a very different proposition. I had my handy diagram, of course, but all the same, I couldn't be sure from the outset that I really knew what to expect. There were too many variables. I had to let the fabric tell me how *it* wanted to look.

I began by carefully running the blocking wires through all the edging points (179 of them), one by one, and only once I had all the wires in place did I deploy any pins or apply any real tension. It soon became clear that the bottom curve was going to be the trickiest part of the whole business, because of the way that the border, which started life as a rectangle, needs to negotiate its way around the pivot-point of the center triangle. So I started there and worked my way first out to either side and then up, saving the top edge for last.

In the end, a gentle curve naturally formed across the top, so I went with the flow. The curve actually runs all the way down the center triangle, with the parallel rows of the pattern marking a lovely arc, rather than a straight horizontal line. Here is a nice photo (click on the image to see a larger version that will display the curve to better advantage).


Although the effect may be slightly exaggerated in this next photo because of the angle at which it was taken, the bottom feather became undeniably somewhat foreshortened (i.e. stretched out more wide than tall) due to the complex tensions being placed on the areas surrounding it.


In a message addressed to me on the Heirloom Knitting Yahoo Group the day after I had posted a series of photos of my FO, Sharon Miller herself had this to say:


I think next time you block this you could try the effect of making the bottom less curved and then the bottom feathers would 'bloom' more - I'd have used straight rods for all but the bottom few points (say 12? along the bottom tip) of these two sides which I'd have fetched the glass-headed pins to do.

The NEXT TIME???

At that point I was still getting over the *first* time. But now, a month or so later, I'm beginning to think that Sharon was right, and that maybe I might be almost ready to give it another go in the not too distant future.

Live and learn, grow and evolve...

Size Matters (a.k.a. Blocking the Princess, Part I)

I blocked my Princess shawl on a Sunday afternoon early in May, within hours of finishing the graft (see previous post). The process ended up striking me as uproariously funny, more or less by accident. I tend to find this particular species of unintentional comedy lurking EVERYWHERE around me. If you really want to hear God laugh, as the saying goes, tell him *your* plans...

Let me say first that it felt STRANGE to have reached this point, after nearly a year and a half of uninterrupted knitting, including *9 months* spent on the center triangle alone (which, being worked from the bottom point upwards, got wider and wider as it went, exaggerating the effect of slow-motion). It came as a bit of a shock to the system to find myself suddenly holding a great limp wad of cashmere/silk fabric that was no longer, in any real sense, a knitting project. No more dainty skein of yarn attached to it anywhere, no more "live stitches" to watch out for along any of its edges, no more complex pattern to follow, no more needles to hold in either hand. I almost didn't know what to do.

But I said almost. Of course the first step was to wash the thing gently. Even with the most careful handling and attentiveness, a LOT of dirt and grime can build up in a knitted fabric over time just from the oils naturally occuring in the skin. Check out this post from fellow lace enthusiast, with a photo of the bucket full of dirty water that came off a perfectly magnificent white shawl. Yuck!! Naturally enough, most of what came off my Princess was loose dye from the dark red yarn, but there was definitely some unpleasant brown ick in there along with the native burgundy. After letting it soak in the suds for a while, I rinsed it many times to take care of all the soap and any leaking pigment, and did not stop rinsing and re-rinsing until the new water stayed clean and clear. Then I drained the sink and pressed down on the shawl to squeeze out the excess moisture (being careful to avoid any lifting or twisting that might damage the fabric), rolled the damp, shapeless mass in a towel, and brought it to the bedroom. I intended to use the queen-sized mattress as a convenient platform for the blocking, because I like the way that the pins fasten into its firm yet pliable surface.

But when I unfolded the shawl began to stretch it out flat, I discovered — to my *astonishment* — that it was WAY too big to fit on the top of the mattress. Calling my husband in from the next room, I said: "Um, I think we have a problem here."

We both stared in consternation at the curiously unfamiliar object sprawled across the bed. It would seriously have sagged over the edges in at least two separate directions if I hadn't caught it and bunched it up in the middle again.

OK, time for Plan B.

Right, Plan B. Hmm...

What's Plan B??

I didn't have a Plan B.

It had never even *occurred* to me to formulate a Plan B.

Back to the drawing board, then.

So I took the shawl back into the bathroom and let it soak in cold water while I made alternate arrangements.

After casting about for suitable flat surfaces in size XXL, I decided that the living room floor would be my best available option. So I herded our six (yes, *6*) cats into the bedroom, cleared the living room and vacuumed the carpet, and then spread out a queen-sized comforter for padding, and started the blocking process all over again.

Even that wasn't quite good enough: in the end, I had to lay down a second comforter next to the first to accommodate one outer corner that needed some additional space.

Let me be clear: this piece of lace is *HUGE*. Mind-bogglingly so, as the late-lamented Douglas Adams would have said. And there is irony here of the deepest and juiciest sort, because I had added two extra border feathers to Sharon Miller's original pattern in order to prevent the finished piece from turning out too small. No, I'm not kidding.

Now, in my own defense, my previous Heirloom Knitting project, the Wedding Ring Shawl — done in the same tiny yarn with the same tiny needles — had turned out to be decidedly on the diminutive side, and I had not wanted the same thing to happen with the Princess.

Be careful what you wish for!!

Not that I was even remotely displeased with the results. Delighted, entranced, amazed, blown over — take your pick. But what made the whole experience that afternoon so overwhelming and surprising and comical is the extent to which I never saw it coming.

Even after watching the silly thing grow, indeed after holding it *in my lap* every day for almost a year and a half, I honestly had no idea just how big it really was.

No idea.

NO EARTHLY *IDEA*.

In its finished form, my Princess shawl measures 104 inches (8 ft. 8 inches) across at its widest point, and 68 inches (5 ft. 8 inches) from top to bottom.

I had a dickens of a time taking decent pictures of the entire thing, even with the wide-angle feature on our little digicam. But by bringing in a step-ladder from the garage and literally holding the camera ON THE CEILING of our living room, I managed to capture this aerial shot. Click on the image for a larger view, as usual. This one will be worth it.


I also got this photo, of which I am particularly fond, by standing in the doorway to the room and viewing the shawl edge-on. Again, click on the image for a full-scale view. What makes this such a "money shot" to my mind is the way that it seems to capture the full scope of the project.


I should add as a footnote (an academic can't resist) that once I got over the initial shock of watching my lace expand from a shapeless blob the size of small briefcase into a great wide expanse of gossamer fabric that took up most of the largest room in our house, I was not disappointed. And it's really not too big for me either: I am only a very average 5' 4" in height, but I can easily wear it without having it drag on the ground. :-)

Oh dear. I haven't talked about its shape yet, as promised in the previous post. Sigh. Ah well, that topic will just have to wait for my next installment.

Saturday, June 6, 2009

Charting the Princess

The Princess shawl is constructed in a complex and interesting way. If you are familiar with the pattern, you may recognize this rough schematic diagram that has been circulating on the web for a while.

When I first aquired the pattern booklet and was getting ready to begin, I made a point of reading all the way through the instructions so that I would know what to expect at each stage and have a clearer grasp of how the various elements of the design fit together. The details of how and why this happened escape me now, but for some reason I found myself on an airplane at the time. I guess it must have been a break from classes and I was en route between where I live and where family members were gathering. Anyway, there I sat with my shiny new pattern book, gazing with anticipation and reverence (and maybe just a soupçon of dread) at the prospect of what I was about to undertake.

Certain procedures described in the booklet confused me at first. I found it hard to picture them in my mind. Remember that I teach foreign language and freshman composition. Words are my primary medium. But with needlework instructions, I often find that too much verbiage can get in the way. When you come right down to it, after all, the foundation of knitting and sewing and crochet and so on is geometry: lines and curves and shapes and axes of symmetry. So as I sat there on the airplane, I instinctively reached for a pencil and paper and made a rough sketch, numbering the stages of the shawl's construction, step by step, as I went. By the time I was finished, I had not only figured out how the process of knitting this shawl was supposed to work, but also made some initial calculations for expanding the number of border feathers from 11 to 13 (as Sharon Miller suggests for extremely fine yarns like the CashSilk).

That humble little diagram — drawn in pencil on the torn bottom half from a letter sized sheet of paper and not at all to scale — went everywhere with me all through the ensuing months and proved itself useful again and again. I eventually had to adjust some of my stitch-counts, of course, and I scribbled new calculations all around the edges, whenever it became necessary. Do you think that I threw it away when the shawl was complete? Oh no, dear reader. Perish forfend!! I kept it tucked into the pattern booklet as a souvenir. It's like a miniature diary of the whole knitting process.

Shortly before the end, though, partly in response to a discussion on the HK Yahoo Group where Sharon Miller posted a diagram of her own to illustrate the finished shape of the bottom edge (after blocking), and partly out of a desire to preserve a more permanent (and aesthetically pleasing) record of what I had done, I used my favorite computer graphics program to produce a nice clean, professional looking rendition of the same basic concept.

I posted this to the HK Yahoo Group at the time, but now with the blog I can make it available to a wider audience. Here it is. Just click on the image to bring up the large version (so you can read all the fine print)...


I really tried to make this diagram an accurate representation of my Princess shawl, with its somewhat altered proportions (2 extra border feathers, larger center triangle, etc.). Yet even this careful sketch would prove to be misleading, when I finally got the fabric stretched out on the blocking wires and began to understand its true shape.

And that is a segue to my next post...

Graft and Corruption (more on the Princess)

Dare I admit it? Grafting lace makes me really, really nervous. Racing pulse, sweaty palms, dry throat, the whole bit.

So before attempting anything on the Princess, I did some hunting around on the Internet in search of inspiration and advice. A quick Google search for the words "grafting" and "lace" revealed an interesting pattern that I found both telling and oddly humorous in approximately equal measure.

Many of the links that turned up were expressive of frustration and/or dismay, and some used *very* colorful language to describe the frayed emotional state to which the writer(s) had been reduced by their first (and second, and third, etc.) attempts to follow well-intentioned instructions designed by others, at least supposedly, to make this notoriously maddening process more congenial to those unaccustomed to it.

No less an authority than Sharon Miller herself has this much to say on the HK web-site: "I think grafting is one of the most difficult things to do in lace knitting and it seems that a lot of knitters share my feelings." And again this (here): "Lace Grafting - only for the brave!"

This is NOT an undertaking for the faint of heart, that much is clear. It reminds me of the ominous warnings often posted near roller coasters and other amusement park rides.

But I took courage from what I had gleaned from my web-surfing, as well as from a handful of suggestions offered by the generous souls on the HK Yahoo Group (where I posted a query), and so I gathered my tools and soon set to work.

Mind you, the seam in question is no more than 3" long. Just 29 little stitches. How hard can it be, right? Or, as my eldest brother is fond of saying, "What could possibly go wrong?" Famous last words...

In the end it took three separate tries and many painstaking and persnickety hours, but at last I came to the conclusion (perforce??) that I had achieved enough precision & accuracy to convince me that it will do. By the end, I honestly didn't know how many more times I could afford to rip the @$%&@#!! seam apart.

Though perhaps not the triumphant walk-in-the-park that I might have wished for, this experience did give me a chance to experiment with several different techniques, and that, I must admit, was highly instructional. Here is the low-down...

Attempt #1: I used the waste-wool method attributed to Lucy Neatby and illustrated both here and again here. The idea is to knit a few rows of garter stitch with contrasting yarn on both sides of the graft and then binding them both off before making the seam down below them. The advantage of this method is that if you know what you are doing and pay close attention, the contrasting threads (where the waste-wool meets the lace fabric) can serve as guidelines for your grafting. I found that part intriguing. The problem I soon encountered, however, was that the gauge of my gossamer yarn is so fine that the waste-wool got in the way and obscured the underlying pattern. So because I could NOT in fact see what I was doing, I failed to perform the necessary decreases on one side of the seam, and the whole thing ended up being off kilter and out of alignment. Grrr.

Back to the drawing board. But first, of course, I had to recover and/or reconstitute the two sets of loops after taking out the seam, which was a decidedly unpleasant process.

Attempt #2: This time I placed the stitches/loops onto a pair of dpn's, one on either side of the graft. That made it really easy both to see the stitches and to keep the seam *loose* (as a wise knitter who lives nearby had stressed in her reply to my query on the Yahoo list).

I think that the second attempt might have succeeded, too, except that I wanted to tighten it at least somewhat prior to blocking, and in that process I very nearly went out of my mind trying to distinguish the grafting thread from the lace fabric proper. Let me reiterate: these are tiny, indeed well-nigh microscopic stitches, and by necessity the strands of yarn (i.e. top loops, bottom loops, and grafting thread) are ALL the same color. So especially in clusters of stitches I found it very difficult to tell which was which — and in circumstances like that you definitely don't want to tug on the wrong loop!

Yet I would probably have been OK and gotten away with it, if the grafting thread hadn't first tangled itself up and then actually broken. At least it was only the grafting thread and not, as at one point I greatly feared, part of the fabric itself. I was very worried that it might have been one of the constituting threads from the provisional cast-on. THAT would have been a nightmare to reconstruct. *Phew*.

Even as it was, the whole thing had disintegrated into enough of a mess (does the phrase "Mongolian cluster frog" exist? It should.) that I decided with gritted teeth that I had better tear it out and start over. Again.

Recovering the loops a second time did not take as long as the first, but the process was far more unpleasant, owing to the fact that the well-worn yarn of these poor stitches had started to "bloom" (i.e. grow fuzzy), a prized characteristic of the CashSilk, to be sure, but one that is generally expected to emerge only after washing & dressing.

Attempt #3: Grim determination. By this time I knew that I had very little margin for error left. Three simply *had* to be the charm. Above all, I really needed to see what I was doing, so that I could judge the effect of each grafting loop before creating the next one (and thereby avoid big mistakes). The dpn's had not hidden the lace as much as the knitted waste-wool had done, but they were not exactly transparent either. So for this attempt, I placed the loops on single thin strands of contrasting waste-wool. Inevitably, without needles to hold them the loops themselves shrank to the diameter of the contrasting yarn, but at least I could keep better track of what I was doing.

Here is a closeup photo of the end result, taken during the blocking (click on the image for an expanded view). I kept the seam relatively loose, and did not either tie down the ends of the various threads or remove the strands of waste-wool. Thus it should be possible to make minor adjustments if necessary, or even (GOD FORBID) to tear it all out & start over, without fear of having to reconstitute the loops yet again.

It may not be quite perfect, but its defects are only minor and that is GOOD ENOUGH FOR ME. Time to make peace with it and move on.